How to make a bra strap bracelet ?
Why Turn Old Bra Straps Into Something Beautiful?
Did you know that every year, millions of bras end up in landfills? Crazy, right? But here’s the thing—those bra straps? They’ve got some serious potential beyond just holding up your, well, you know. I discovered this a while back when I was decluttering my closet and found a bunch of old bras that were way past their prime. Instead of just tossing them, I figured, why not get a little creative? That’s when I stumbled upon the idea of turning those bra straps into bracelets. Trust me, it’s way more fun than it sounds, and the best part? You get to make something totally unique that you can actually wear! If you’re like me and love a good DIY project, stick around—I’m about to show you how to make a bra strap bracelet that’s not only stylish but also super easy to whip up.
Key Steps To Make A Bra Strap Bracelet
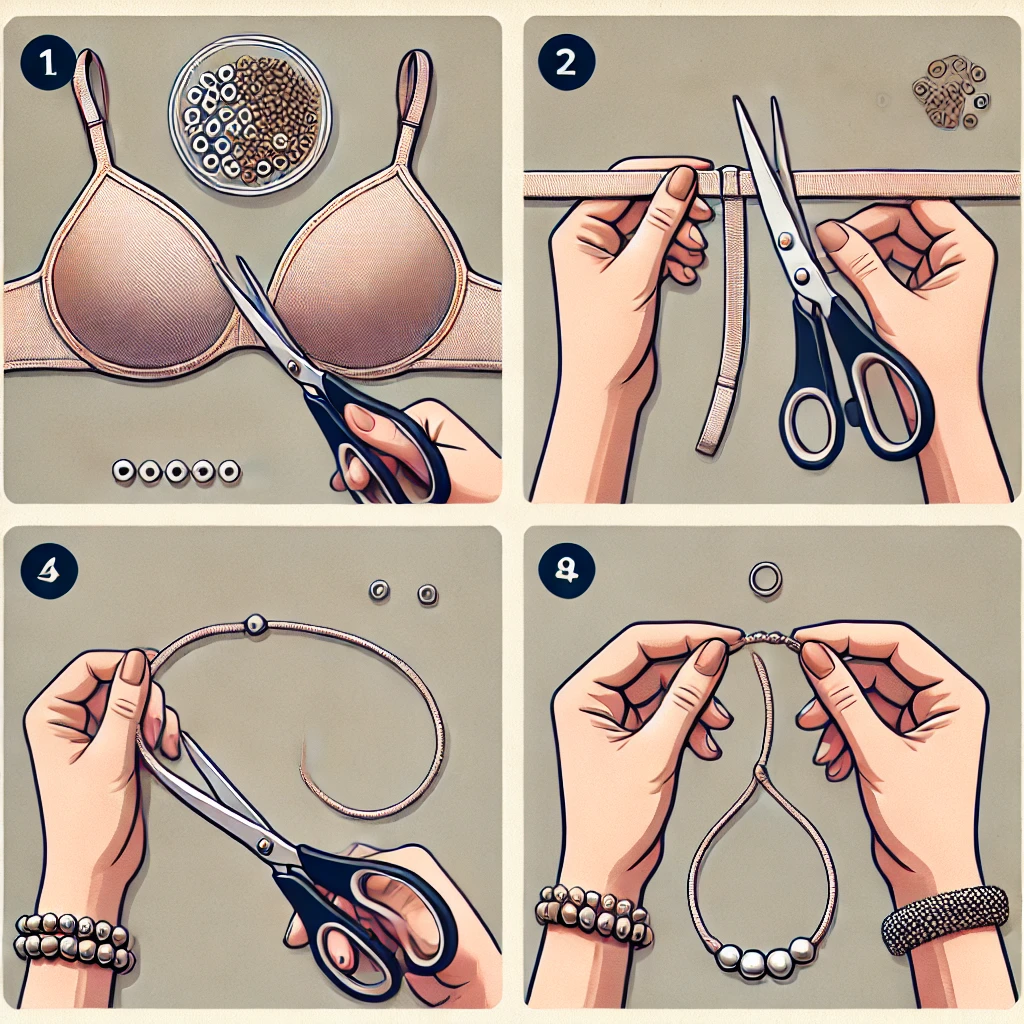
- Remove the bra strap.
- Measure and cut the strap.
- Secure the ends with fabric glue or needle and thread.
- Add beads, charms, or buttons to personalize it.
- Make final adjustments for the perfect fit.
If you’re like me and love a good DIY project, stick around—I’m about to show you how to make a bra strap bracelet that’s not only stylish but also super easy to whip up.
Materials You’ll Need to make a bra strap bracelet

Alright, before we get our hands busy, let’s gather everything we need. You don’t need much, and honestly, you might already have most of these items lying around. Here’s what you’ll need:
- Old bra strap: The star of the show! If you’ve got a bra with straps that are still in good condition but the bra itself has seen better days, that’s perfect.
- Scissors: To cut the strap and any loose threads.
- Needle and thread: I won’t lie—this part can be a bit tricky if you’re not into sewing. But hey, no worries! You can always use fabric glue if you’re not up for stitching.
- Decorative beads, charms, or buttons: This is totally optional but highly recommended if you want to add some personality to your bracelet. Got an old necklace you don’t wear anymore? Take it apart and use the beads!
- Measuring tape: To measure your wrist and cut the strap to the right length. Trust me, you don’t want to skip this step—it’s key to getting the perfect fit.
Step 1: Remove the Bra Strap
Let’s kick things off by liberating that bra strap! I remember the first time I did this, I was a bit nervous—like, what if I mess it up? But trust me, it’s easier than it sounds.
- Carefully cut the bra strap from the bra, making sure to get as close to the seam as possible. You don’t want any jagged edges, but if you do end up with some, no worries! You can trim them down later.
- Keep the adjuster on the strap if it has one. This little piece can come in handy later, especially if you want your bracelet to be adjustable. It’s like a hidden gem you didn’t know you needed!
You know, the first time I did this, I didn’t realize how satisfying it would be to repurpose something that was just sitting in my drawer. It’s like giving new life to an old friend!
Step 2: Measure and Cut the Strap
This step is where things start coming together. I once made the mistake of eyeballing the length—don’t do what I did. Measuring is key!
- Measure your wrist using the measuring tape. Wrap it around your wrist and make sure it’s snug but not too tight. Note down that measurement.
- Cut the strap to the desired length, leaving a little extra for overlap. It’s always better to have a bit more than you need because you can always trim it later. I usually add about an inch just to be safe.
- If you’re planning to add beads or charms, now’s the time to string them onto the strap. Trust me, it’s easier to do it now than after the ends are secured. Plus, this is where you can get really creative—maybe mix and match beads from different old jewelry pieces.
I remember the first bracelet I made—I got so carried away with the beads that I almost ran out of strap! But hey, it turned out pretty awesome, if I do say so myself.
Step 3: Secure the Ends
Here’s where you’ll really see your bracelet take shape. It’s like magic, but with fabric and thread!
- Fold over the cut ends of the strap, and either sew them together or use fabric glue to secure them. If you’re using glue, hold the ends together for a few minutes to make sure they bond well. The last thing you want is for your bracelet to come apart the first time you wear it!
- If you’re using an adjustable strap, you can leave one end open until you’ve done a final fitting. That way, you can still make tweaks if needed. It’s a little trick I learned after making a few too-tight bracelets!
Honestly, this part can be a bit fiddly, especially if you’re new to sewing or gluing fabric. But stick with it—once you’ve got the ends secured, you’re more than halfway there!
Step 4: Add Personal Touches
Now, here’s the fun part—making it yours. Whether you’re into simple, minimalist designs or something more elaborate, this is where you can really let your personality shine.
- Add beads, charms, or even a button as a clasp. Think about what makes you happy—are you a nature lover? Add a leaf charm. Into astrology? How about a star-shaped bead? The sky’s the limit!
- You might want to play around with different combinations. Sometimes I’ll lay out all my beads and charms before committing to anything, just to see what looks best. And don’t be afraid to try something unconventional—I once added a tiny key charm from an old diary, and it became my favorite piece!
I remember one time, I found this tiny, heart-shaped button in my sewing kit and thought, “This would be perfect for a bracelet!” I stitched it on as a clasp, and it added such a cute, personal touch. Every time I wear it, it makes me smile.
You may like this too: What is the biggest bra size?
Step 5: Final Adjustments
Almost done! This step is all about making sure your bracelet fits just right.
- Try the bracelet on for size. Does it feel comfortable? Is it too loose or too tight? If it’s not perfect, don’t worry—you can still make adjustments. This is where the adjuster comes in handy if you left it on the strap.
- Make any necessary tweaks. If the bracelet is too loose, trim a bit more off the strap. If it’s too tight, consider adding an extra piece of fabric or a few more beads to give it some extra length.
The first time I made one of these bracelets, I got a little too excited and finished it before checking the fit. It ended up being a bit tight, but I figured out how to fix it by adding an extra bead at the end. So don’t stress—there’s almost always a way to make it work!
Conclusion:
And there you have it—a chic, one-of-a-kind bracelet made from something you’d otherwise toss away. This DIY project isn’t just about crafting; it’s about giving new life to something old. Plus, you’ve now got a cute accessory that’s totally unique to you! Whether you keep it simple or go all out with the embellishments, your bra strap bracelet is bound to turn heads. So why not make a few more and gift them to your friends? And hey, if you’ve got any tips or ideas on how to jazz up these bracelets even more, drop a comment below—I’d love to hear what you come up with!